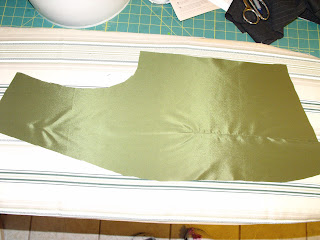
I chose this green silk taffeta for the lining because it is breathable, which is very important in Florida, has a bit of a stretch and above all it was very inexpensive. I found it at Walmart- yeah Walmart! I was on clearance for $1.00 a yard and given the choice I would have gone with a different color, maybe burgundy, but olive green was the only option.
I started this project with stitching the darts. I remembered why I hate using commercial patterns vs. slopers with this project. Using a tracing wheel and tracing paper is tedious and clumsy but it works.
On to the task of pocket making, which can be a chance to show your personal style. In my opinion there are not many opportunities in menswear to do so but since this was my first attempt using this pattern and making a vest I chose to follow the pattern's detailing. I interfaced the two welts, pressed them in half and stitched a 1/4'' seam allowance in the two short ends.
Then I turned them, being careful to make the corners a fine point- thanks to my point turner, and top stitched the edges.
Then I positioned the pocket facing right side down and pocket lining on the vest front perpendicular to the welt's position. All pieces were basted in place then finally stitched with a 3/8'' seam allowance with the pocket facing 1/4'' shorter on each end of the stitch than the lining.
The little triangles can be tricky to control when turning so I broke out the "Stitch Witchery" to hold them on place. I first discovered this ingenious product when I was making trouser pockets a few months ago and since then I have found a time saving use for it on every project. It is more sturdy than glue basting and more consistent than trying to pin something tiny. I'm sure Stitch Witchery will be mentioned again in the near future.
After lots of pressing the welt and pocket edge when the facing and lining meet are ready to be edge stitched. I used black embroidery thread for this and payed close attention to the pocket bag so I didn't catch it in the stitching.
Then I pulled the pocket out, pinned the seams together and stitched a 1/4'' seam allowance. I then trimmed the seam allowances a bit and turned it right side out. Now the raw edges are inside the pocket.
Then I edge stitched the pocket bag enclosing the raw edges. This is a neat trick that I adopted from trouser making. It was lucky that I had previous experience finishing pocket bags because this step was very vague in the Burda pattern.
So here is the finished pocket. My next vest I am going to play with the design because all though it is fine, I don't care for the large opening. The edge of the pocket is directly lined up under the edge of the welt and leaves an opening almost as large as the welt itself. I haven't quite worked out how to make the opening smaller but I will let you know when it has been done.
Then next step in the pattern is to sew the facing to the lining. This step really could have been done at any time previously and in the future I will do it along with the dart sewing. This seam requires a bit of easing because you are joining two unmatched pieces. With right sides together they will not lay flat. I used a 5/8" seam allowance and pressed the raw edges toward the lining.
This step is where I initially got confused and had to beg Mike to pause Dr. Who so I could have quiet to think. With right sides together the lining and fronts are stitched together at all seams except for the sides and shoulder seams. Then the seam allowance is trimmed, curves clipped and the whole thing is turned right side out through the side and shoulder seams.
Why I was confused is because the directions state sew all seams except the side seams. It didn't mention the shoulder seam so I pinned everything together and tried to turn it realizing everything needed to be pulled through the shoulder seam as well as the side seam. I am glad I didn't follow the pattern blindly or I would have gone after the seam ripper yet again.
This next step is where the huge flaw is in this pattern. It completely leaves out the back lining. So again Dr. Who had to be paused and Mike may have been questioning if his begging for men's wear was really worth it ;p I stitched a 5/8" seam allowance at all seams except for the side seams and shoulder seams, clipped curves and trimmed seam allowances.
Then the fronts were pulled though the shoulder seam and the back was turned through the side seams. This technique is pretty awesome, leaving all seams except for the shoulder and side completely enclosed. I will definitely be adding it to my bag of sewing tricks.


